The K3Pro XP-Line: Extended Prosthetics
Sustainable implantologists are aware of the scientifically proven 3 mm rule with regard to the required mucosa thickness above the implant for long-term success and strictly observe this. The optimal initial situation - a 3 mm thick healthy gingiva - is generally rare, which very often requires considerable effort in soft tissue surgery for implants to be placed equicrestally. The proven, subcrestally placed and bacteria-proof K3Pro from Argon with its well-known outstanding bone and gingiva preservation provides demanding implantologists and patients with the necessary security, even under the most difficult conditions.

The 3-millimeter+ rule
Compliance with the 3 mm rule, taking into account older recognized studies, plays a central role in the stable tissue concept, which is becoming increasingly important in modern implantology. This rule states that a total soft tissue height of at least 3 mm must be ensured during implant placement in order to achieve stable and attractive results in the long term. However, 4 mm would be better.
Stable Tissue aims to shape and maintain the soft tissue around the implant so that it remains stable and does not recede. This is crucial to avoid both functional and esthetic complications. The soft tissue plays a fundamental role in protecting the underlying bone and preventing peri-implantitis with the associated risk of implant loss.
Recent studies have shown that a soft tissue thickness of less than 3 mm in bone level implants often leads to recession and esthetic compromise. Adequate soft tissue, on the other hand, acts as a barrier against bacterial invasion and mechanical stress.
This promotes the integration of the implant and helps to ensure that the surrounding tissue remains healthy and stable.
But we know that 3 mm gingiva is rare. The K3Pro system with its micro-movement-free, bacteria-proof conical connection is optimized for subcrestal use. Experienced users have therefore always placed the implant deeper in order to be on the safe side regardless of the mucosal conditions.
We are therefore talking about the evolution towards the 3 mm+ rule, as the bone height can be included in the overall biological height. The practical implementation of this rule is surprisingly simple with K3Pro XP: after successful analysis of the soft and hard tissue supply, a shorter implant with extended prosthetic components (Xtended Prosthetics) can achieve a uniquely sustainable result in cases of doubt.
Working according to the stable tissue concept is essential to ensure the longevity of implants. The correct volume of hard and soft tissue is the key factor for the success of implant therapy and contributes significantly to patient satisfaction.

Creating Stable Tissue
After decades of gaining scientific knowledge, oral implantology has long since outgrown its infancy as a successful form of treatment. It is time for doctors and patients to become demanding! Pure function is no longer enough, perfection in esthetics and sustainability is possible.
Experienced implantologists know: "The bone sets the tone, but the tissue is the issue". Sustainable preservation of the soft tissue requires stable bone conditions. But what happens if this is not the case? Especially if considerable damage has already occurred due to outdated, highly invasive implant systems that do not comply with the principles of biological dentistry?
The preservation of hard and soft tissue is essential for long-term implantological success in terms of both esthetics and function. With regard to sustainability in hard tissue management, science has successfully established the concept of preventing any bone loss. By adhering to strict rules in surgery and prosthetics, some of which require a great deal of effort, long-term bone preservation is possible.
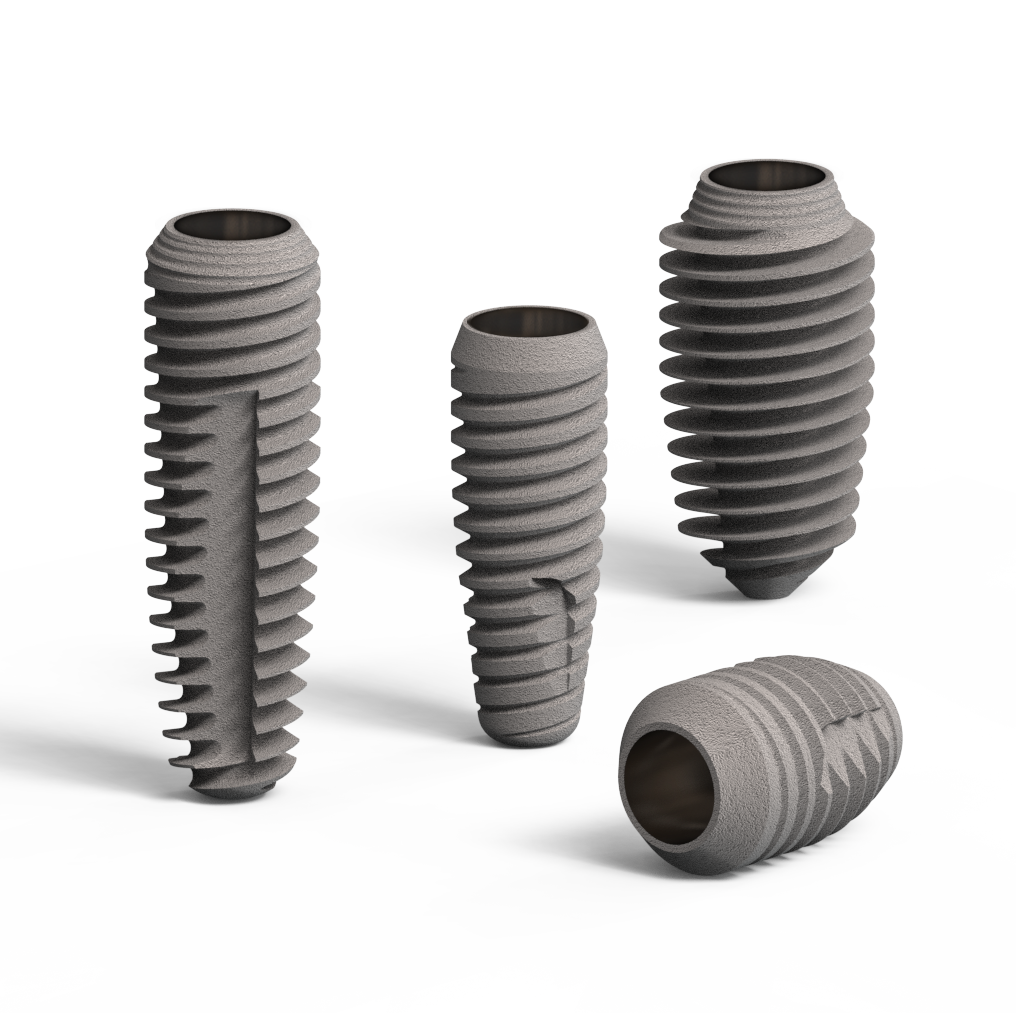
At Argon Dental, we firmly believe that in implantology, the long-term health of the soft tissue and perfect red-white esthetics must begin deep in the cancellous bone and we consistently implement this with our products: with a two-part implant that is placed subcrestally, is bacteria-proof and anatomically corresponds to the shape of the tooth. Delicate in the bone, but stable and strong exactly where it matters: at the implant-abutment connection.
This is the essential prerequisite for creating stable soft tissue conditions under all circumstances. We take the bone resorption prevention principle a decisive step further:
We are Creating Stable Tissue.
Unleash the full biological potential of K3Pro with the new XP Line
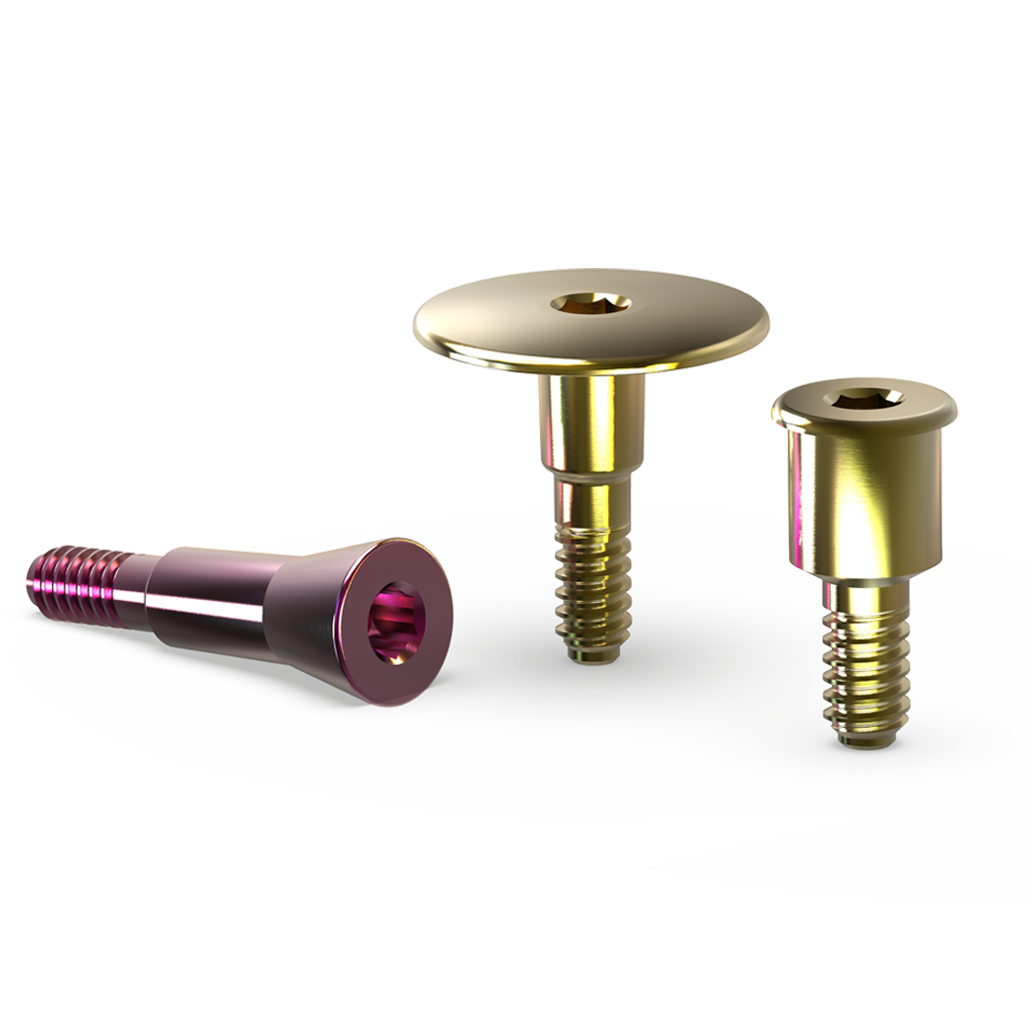
With the K3Pro XP system, we remove the system-related limitation of the subcrestal insertion of a maximum of 1 mm and eliminate the use of the reamer for subsequent adjustment of the emergence profile. By preparing the bone emergence profile using our new Bone Profile Screws and the variable use of up to 3 mm subcrestal insertion, you can expect the highest esthetic results with absolute repeatability with a follow-up program of prosthetic components that can be perfectly integrated into the existing profile.


Phase 1: BPS
Choose your insertion depth
The basis for the biologically optimal design of the sulcus is achieved by shaping the bone profile. The Bone Profile Screw (BPS) is available for three different subcrestal insertion depths depending on the indication.
1 mm subcrestal = B1
2 mm subcrestal = B2
3 mm subcrestal = B3


Phase 2: TA
Shape the fabric
In this phase, you pick up the bone emergence profile, which was formed by the Bone Profile Screw (BPS) and thus remains untouched, in a shape-congruent manner. The decisive criterion for selection is the total height of the tissue above the implant shoulder.
1 mm tissue height = H1
2 mm tissue height = H2
3 mm tissue height = H3
4 mm tissue height = H4
5 mm tissue height = H5
6 mm fabric height = H6


Phase 3 Analog: GT / OT Digital: SB
The laboratory transfer
In contrast to the selection of the height of the Bone Profile Screws (BPS), the height of the impression posts (such as healing abutments) is shown based on the total height measured from the implant shoulder. This is the total biological height above the implant. The scanbodies can be used universally.
1 mm tissue height = H1
2 mm tissue height = H2
3 mm tissue height = H3
4 mm tissue height = H4
5 mm mesh height = H5
6 mm fabric height = H6


Phase 4: Prosthetics
The selection of the prosthetic component
In this example, there is a subcrestal insertion of 2 mm, whereupon a Bone Profile Screw B2 was used.
The minimum height of the abutment to be selected is therefore > 2 mm, but ideally approx. 0.5 - 1 mm below the gingiva. An abutment P 3.1 (prosthetic step 3.1 mm above the implant shoulder) is used.
1.1 mm prosthetic step = P 1.1
2.1 mm prosthetic step = P 2.1
3.1 mm prosthetic step = P3.1
4.1 mm prosthetic step = P4.1


Guide to choosing the right abutment
Step 1: Selecting the correct prosthetic platform.
Make sure you know which platform the implant to be restored belongs to:

2 mm platform
Implants with a diameter of 3.0/3.5 mm

3 mm platform
Implants with a diameter from 4.0 mm

Short platform
Implants with a length of 5.5 - 6.5 mm
Note: The same abutment type is usually used for the yellow and blue platforms, but the difference lies in the retaining screw, which must be ordered separately.
Step 2: Selecting the preparation height (total height) Within the K3Pro system, the preparation height describes the distance between the preparation level and the implant shoulder. It should be noted that K3Pro implants are generally placed subcrestally. Within the Stable Tissue Concept and thus the use of K3Pro XP components, the insertion depth can be easily determined by identifying the Bone Profile Screw used:
Caution: This information is very important as it specifies the minimum height of the abutment to be selected. Falling below this height would result in the preparation margin not being within the gingiva as desired, but subcrestally.
Taking into account the minimum height (B), the prosthetic step should therefore be 0.9 mm below the tissue height (H).


In this example, there is a subcrestal insertion of 2 mm, whereupon a Bone Profile Screw B2 was used. The minimum height of the abutment to be selected is therefore > 2 mm, but ideally 0.9 mm below the gingiva. An abutment 3.1 (prosthetic level 3.1 mm above the implant shoulder) is used.
H - 0.9 = P
P ≠ B

Implant occlusions
The K3Pro portfolio offers various options to positively influence the biology during healing and to anatomically optimize the subsequent prosthetics. Simultaneous augmentation for implant placement is also possible thanks to the subcrestal philosophy. Find out more here.

Transfer and laboratory components
Of course, K3Pro offers you transfer components for manual open and closed transfer as well as digital scanning intraorally and in the laboratory. In addition to the classic analogs, discover a revolutionary two-part system that considerably simplifies dental work.
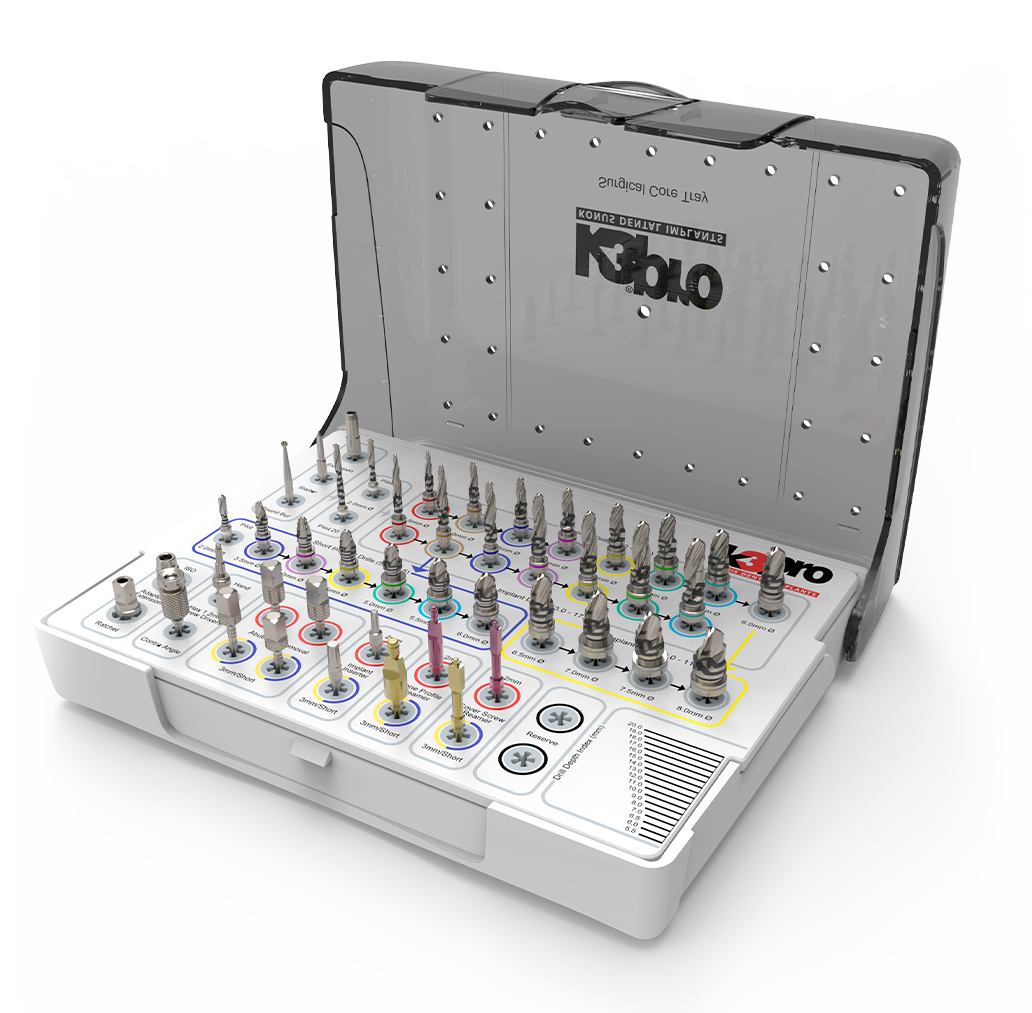
Instruments & Accessories
High-precision, modular systems that can be customized according to your requirements and the thread designs and lengths you use. Clear, durable and in one place!